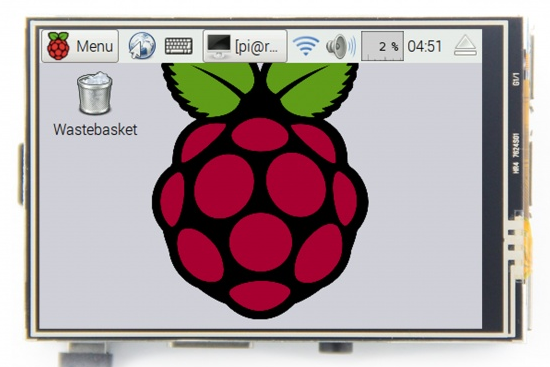
Features
- 320×480 resolution
- Resistive touch control
- Supports any revision of Raspberry Pi (directly-pluggable)
- Compatible with Raspberry Pi A, B, A+, B+, 2B, 3B, 3B+versions
- Drivers provided (works with your own Raspbian/Ubuntu directly)
- Size perfectly fits the Pi
- High quality immersion gold surface plating
- Supports Raspbian system, ubuntu system ,kali Linux system
Key Parameters
| SKU | MPI3501 |
| LCD Type | TFT |
| LCD Interface | SPI |
| Touch Screen Type | Resistive |
| Touch Screen Controller | XPT2046 |
| Colors | 65536 |
| Backlight | LED |
| Resolution | 320*240 (Pixel) |
| Aspect Ratio | 8:5 |
| Backlight Current | TBD |
| Operating Temp. (℃) | TBD |
Interface
| PIN NO. | SYMBOL | DESCRIPTION |
|---|---|---|
| 1, 17 | 3.3V | Power positive (3.3V power input) |
| 2, 4 | 5V | Power positive (5V power input) |
| 3, 5, 7, 8, 10, 22 | NC | NC |
| 6, 9, 14, 20, 25 | GND | Ground |
| 11 | TP_IRQ | Touch Panel interrupt, low level while the Touch Panel detects touching |
| 12 | KEY1 | Key |
| 13 | RST | Reset |
| 15 | LCD_RS | LCD instruction control, Instruction/Data Register selection |
| 16 | KEY2 | KEY |
| 18 | KEY3 | KEY |
| 19 | LCD_SI / TP_SI | SPI data input of LCD/Touch Panel |
| 21 | TP_SO | SPI data output of Touch Panel |
| 23 | LCD_SCK / TP_SCK | SPI clock of LCD/Touch Panel |
| 24 | LCD_CS | LCD chip selection, low active |
| 26 | TP_CS | Touch Panel chip selection, low active |
Driver Installation
- Download raspbian image.
https://www.raspberrypi.org/downloads/raspbian/
- Tulis raspberry image ke sdcard.
- Buka terminal, install driver lcd pada Raspberry Pi.
git clone https://github.com/goodtft/LCD-show.git
chmod -R 755 LCD-show
cd LCD-show/
sudo ./LCD35-show
- Tunggu beberapa saat, Raspberry Pi akan reboot dengan sendirinya.
Touch screen calibration
Touchscreen dapat dikalibrasi dengan menggunakan program xinput_calibrator.
cd LCD-show/
sudo dpkg -i -B xinput-calibrator_0.7.5-1_armhf.deb
Setelah instalasi selesai, buka Preference->Calibrate Touchscreen. Ikuti perintah yang muncul pada layar. Jika kalibrasi selesai, copy parameter yang dihasilkan pada file 99-calibration.conf, kemudian simpan di folder /ect/X11/xorg.conf.d/.
/ect/X11/xorg.conf.d/99-calibration.conf
Problem Solving
- Jika touchsreen antara x dan y tertukar, dapat diatasi dengan solusi berikut ini:
sudo nano /boot/config.txt
dtoverlay=piscreen,speed=16000000,rotate=90
reboot
- Jika x axis posisinya dalam keaadan mirror, dapat diatasi dengan solusi memasang
evdev.apt-get install xserver-xorg-input-evdev
Ganti urutan file pada folder
/usr/share/X11/xorg.conf.d. Hal ini dilakukan agar konfigurasi evdev tidak tertimpa (overide) dengan konfigurasi libinput. Ganti angkaevdev.conflebih tinggi dari padalibinput.conf.cd /usr/share/X11/xorg.conf.d sudo mv 10-evdev.conf 45-evdev.conf reboot
Download
Jika kesulitan untuk memasang drivernya, dapat langsung mengunduh image yang sudah disediakan.
| Image Name | Version | Support | Password | Download | |
|---|---|---|---|---|---|
| Raspbian | 2018-06-29 | PI3B+/A/A+/ B/B+/PI2/PI3/ ZERO/ZERO W |
user:pi password:raspberry |
MPI3501-Raspbian-20180629.7z | |
| Ubuntu | Mate:16.04 | PI3,PI2 | user:pi password:raspberry |
3.5inch-RPI3-RPI2-ubuntu-mate-16.04-beta2.7z | |
| Kali-linux | 2018.2(nexmon) | PI3B+,PI3,PI2 | user:root password:toor |
3.5SPI-kali-linux-2018.2-rpi3B+-nexmon.7z | |


 Users Today :
  Users Yesterday :
  This Month :
  This Year :
  Total Users : 201558
 Views Today :
  Total views :
  Who's Online :
Hey Akhal thanks for your post it help me.
i am Stuck in the login terminal. Use a Raspi pi 4 and kali linux nexman.
would by nice if i get your help, for seting the desktop environment up for the pi tcouchscreen.